
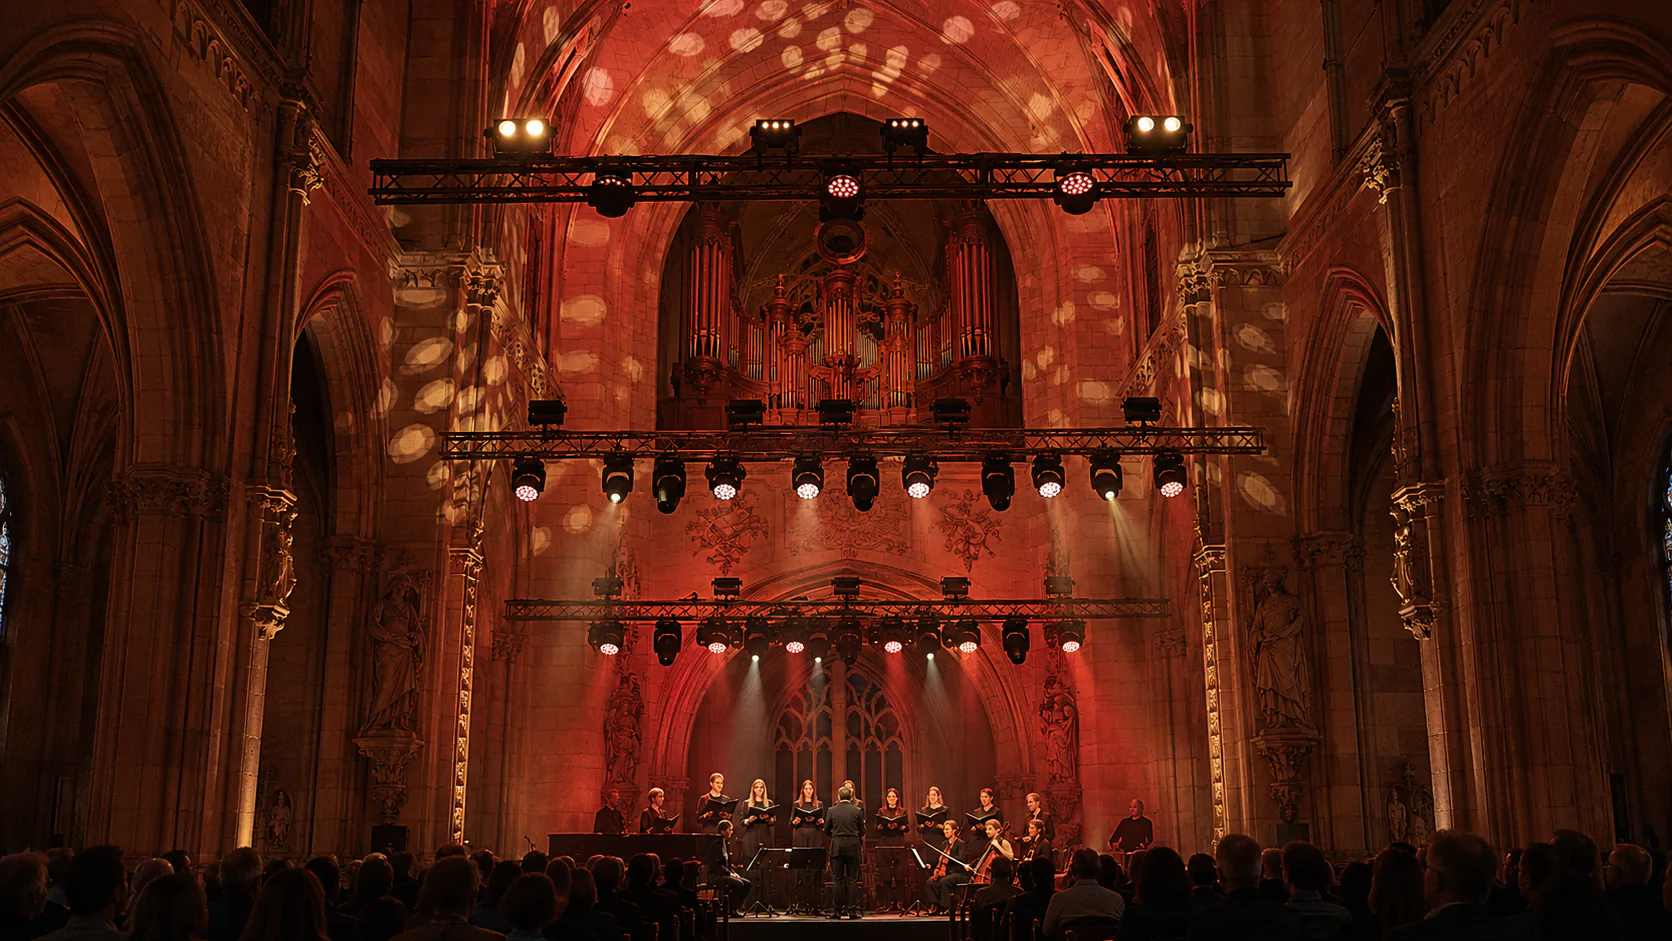
Start with the room's recurring uses
Walk the space before choosing a fixture. Mark the lectern, worship leader, singers, instruments, choir, screen, seating, camera positions and safe rigging points on one plan. Record the throw from each possible mounting position to each target, along with trim height, sightlines, available power, control paths and access for maintenance.
Then write the scenes the team actually needs. A sermon normally calls for stable, readable faces and restrained transitions. Music may use a broader color palette, while still keeping vocalists visible. A livestream needs repeatable light at the camera's exposure settings. Weddings, school productions and community events may move the speaking area or change the stage layout. House lights and emergency lighting need their own approved design and controls; a stage-lighting cue is not a substitute for either.
| Use state | Primary visual task | Acceptance check |
|---|---|---|
| Sermon or reading | Keep the speaker's face clear without lighting the screen or front seats unnecessarily | Walk the normal speaking path; inspect from the rear seats and every camera |
| Worship music | Preserve readable faces while adding controlled color and depth | Run both a quiet song and a full-band cue; check skin tones and spill |
| Livestream or recording | Hold exposure and color through real camera settings and dimmer states | Record the production frame rate, shutter and camera profile; check the footage |
| Multi-use event | Recall a different stage layout without rebuilding the rig | Test saved positions and document which cues require refocusing |
This task list is more useful than starting with fixture counts or LED wattage. The required number and output depend on the room geometry, mounting positions, optical data and the result of a representative on-site test. We do not recommend a universal “lights per stage width” formula.
Separate speaking areas from scenic and architectural areas on the plan. Include a standing speaker, a seated interview and a choir arrangement if the venue uses them. For each target, record whether the position is fixed, occasionally moved or changed every week. Keep screens and camera sightlines on the same drawing so an optical decision can be judged against the whole room.
Agree who accepts each outcome. The worship team can judge comfort and scene transitions, the video team can judge recordings, and the installation team can assess access and mounting constraints. Save a reference photograph for each operating scene, using the same camera position and exposure. That gives the team a useful comparison when furniture, stage height or a lighting preset changes.
Specify wash and profile by what each must do
A wash lights an area. In a worship space it can cover a speaker's movement zone, a row of singers or a scenic surface. Compare the beam at the actual throw and zoom setting: useful field size, edge quality, color consistency and how the field overlaps adjacent fixtures matter more than a headline LED-power figure. A moving wash can recall different aim and zoom positions between scenes, but one optical system still lights only its current target at any instant. Simultaneous speaking and band areas need enough independent light sources.
A profile is useful when the light needs a controlled boundary. Framing shutters can isolate a lectern, keep spill off a projection screen or define a solo position. First decide whether that position is fixed. A static profile may be sufficient for a permanent pulpit; a moving profile is justified when positions change and repeatable focus is valuable. Request a live demonstration of edge quality, framing travel, focus and output at the intended distance. Do not assume every fixture described as a “spot” includes framing shutters.
Treat colorful beams, pixel effects and moving looks as separate layers. They can support music cues, but should not be the only source of facial light. Aolait's Zoom Wash Moving Head range is a starting point for documented moving-wash options; the profile role in a project should be sourced and tested against its own approved specification.
Front light should reach faces from positions that suit the room and camera views. Very steep light can leave eyes in shadow; a low position may create glare or obstruct sightlines. Walk the complete speaking path while watching both the live camera image and the rear seating view. Test a seated subject as well as a standing subject before finalizing the mounting arrangement.
A projection screen may sit close enough to the speaking zone that even a soft wash edge reduces image contrast. Check this with normal slides and video while the speaker moves. A profile can help contain that spill, but its framing must still allow the required movement. Save separate lectern and interview cues if the positions demand different boundaries.
Test quiet operation during the quietest moments
The most revealing acoustic cue may be a pause in speech, prayer or an unamplified reading. Fans, zoom motors, pan/tilt movement and loose mechanical parts can become noticeable near an open microphone or the first seating rows. A “silent mode” label alone cannot establish what the audience will hear.
For each shortlisted fixture, record its model, firmware, mounting position, ambient temperature and operating mode. Listen after warm-up during idle, static white or color, dimmer fades, zoom, slow movement, fast movement and reset. Repeat at the lectern microphone, first seating row and control position. Note whether a quieter fan mode changes available output or thermal behavior. Compare recordings and listening notes from the same operating states. Set an acceptable noise threshold with the venue team before choosing a fan mode or mounting position.
Keep the acoustic test repeatable. Use the same listening positions, microphone gain, fixture orientation and operating duration for each candidate. Record whether the objection is a steady fan sound, an intermittent motor sound or a vibration transmitted into the mounting structure. Ask the installation team to inspect mechanical vibration instead of masking it with a different cue.
Program movement between speaking segments where the service permits it. A fixture can remain stationary throughout a reading and change focus during a transition. Test the return to a saved position after a power cycle, because startup and reset movement can be more noticeable than a normal fade. Any chosen quiet mode must still deliver the required light throughout a long service.
Test with the cameras the venue will use
“Flicker-free” is not a complete camera specification. Banding can depend on the fixture's drive and dimmer behavior, camera frame rate, shutter settings, rolling shutter, exposure and the selected color or output level. A fixture that looks clean to the eye may fail at a low dimmer value or during a fade.
Make a short test reel with the production camera bodies and normal recording settings. Capture faces in white and mixed color, then test full output, typical sermon level, low output, slow fades and the most demanding music cue. Include a moving subject and the actual screen in frame. Check the footage at full size rather than only on a camera monitor. If the venue changes frame rates or uses a second camera system, repeat the test. The Aolait camera-flicker guide explains the variables to log. A published PWM number, where available, does not replace the test.
Also compare color from fixture to fixture and across camera angles. Check skin tones, clothing and scenic colors with the intended white-light mix. If color-rendering metrics are part of the brief, request the measurement conditions and test them alongside the actual cameras; a single index cannot describe every camera and color combination.
Create a simple camera test log with one row per clip: camera body, lens, frame rate, shutter, exposure, white balance, fixture mode, color and dimmer level. Keep automatic exposure and white balance from hiding changes during the comparison. Include the settings used for both the livestream and any separate recording workflow.
Place subjects in overlapping wash fields and at the edges of speaking zones. Check whether brightness and color change as they move, and inspect highlights on pale clothing as well as shadows on faces. Repeat a slow crossfade between sermon and music presets. Watch the recorded file on a production display, then save the successful settings with the show documentation.
Build a control system volunteers can repeat
The operator should be able to run the normal service without editing channels or rebuilding a show file. Separate a small set of named scenes—pre-service, sermon, music, prayer, announcements and room reset—from specialist effects programming. Give each scene a documented purpose, safe transition and fallback. Lock down the show file and keep a tested backup.
For the fixture patch, record the exact DMX personality, start address, universe, software profile and firmware version. Test pan/tilt, dimming, zoom and any effect layers before saving presets. A change from a compact to an expanded channel mode can shift every subsequent address; do not assume a profile with the same model name matches every firmware revision. Our DMX channel-planning guide covers address and universe calculations. Compare the console profile with the selected personality, then operate each function before storing a preset.
Decide who can operate house and stage lighting when the regular technician is absent. Label the normal startup and shutdown steps, and agree which settings may be changed by a volunteer and which require a trained programmer. Power, emergency-lighting and rigging decisions belong to qualified local professionals.
Build presets around functions the operator recognizes. A button labelled “Sermon” should recall the face light, scenic level and fade time that the team agreed to use. Keep a clearly labelled normal-service fallback scene separate from any effect sequence. Demonstrate which controls change only intensity and which can move fixtures or alter color.
Rehearse recovery with a volunteer before handover: restart the console, reconnect control, load the backup show and recall the normal-service scene. Document the expected behavior if a fixture loses data. A spare fixture should have its mode and address checked before it joins the rig, so a quick replacement does not disturb neighboring addresses.
Compare moving-wash options for the venue
Our Zoom Wash range offers different optical ranges, color systems and protection formats. Start with the lighting task, then test a candidate at the proposed mounting point. Select the quantity after checking coverage and overlap with the actual stage layout.
| Model | Optical and installation characteristics | Where to focus the venue test |
|---|---|---|
| AL1019WZ | 19 × 15W RGBW; 8°–63° motorized zoom; 16CH/24CH personalities; IP20; 7.5 kg | Broad indoor area coverage and transitions between speaking and music positions; camera color and fades at the normal service level |
| AL150WX | 150W RGBL; 19°–27° zoom; 24 RGB auxiliary pixels; indoor dry-location use; 4.4 kg | A compact installation with a narrower zoom span; the field size and white-light mix at the intended throw |
| ALP1940WZ | 19 × 40W RGBW; 4°–60° zoom; IP65; 14 kg | A rig shared between indoor events and outdoor work; coverage, mounting load, cable connections and access |
AL1019WZ offers a wider zoom span than AL150WX, which matters when one mounting point serves several differently sized areas. AL150WX has a lighter, compact format and an RGBL main emitter; assess the field at both zoom endpoints rather than assuming it will replace a wide-range wash. ALP1940WZ adds an IP65 format for projects that also work outside. An indoor sanctuary does not automatically need that protection level.
Zoom range describes the available angular span, not the number of people that a fixture can light or the exposure a camera will achieve. Compare the field at the same throw, operating level and color setting. The emitter wattages in this table describe the LED configuration; they are not a direct comparison of usable face light. Keep acoustic and camera testing in the shortlist process for all three models.
Plan for maintenance before approving the rig
A system used every week needs a service route. Confirm that staff can reach lenses, filters, fans, connectors and clamps without dismantling scenery. Define who inspects secondary suspension, cable strain relief and power/data connections; who updates software and fixture profiles; and how failed units are identified and removed from service. Keep the approved manuals, patch, cue backup, spare-part list and test records together.
Check the plan after a layout change, a new camera, firmware update or replacement fixture. A replacement with the same model label may still need a profile and color check. The stage-lighting inspection guide and stage-lighting maintenance checklist can support the handover and ongoing records.
Choose a cleaning and inspection interval around the venue's actual dust, use and access conditions, following the fixture instructions. Assign responsibility to a named role rather than leaving maintenance to whoever notices a problem. Log lens condition, cooling-path cleanliness, connector damage and any unusual movement or sound. Isolate a faulty unit and arrange service instead of repeatedly resetting it during an event.
Keep one practical handover folder available to the lighting team: the stage plan, fixture schedule, patch, show backup, operating guide and service contacts. Store a separate copy away from the controller. When a camera, fixture or firmware version changes, repeat the affected acceptance checks and record the new settings. The folder should explain how to restore the normal service, even when the original programmer is unavailable.
A practical acceptance checklist
Before approving an order or installation, ask the project team to demonstrate these outcomes in the venue or a representative mock-up:
- Every speaking and music position is legible from the main seats and recorded camera views.
- Wash fields cover their assigned areas without objectionable spill on screens or the congregation.
- Profile edges and saved positions remain usable across the planned room layouts.
- Quiet cues are acceptable at microphones and nearby seats after the fixtures warm up.
- Real camera recordings show acceptable color, dimming and flicker behavior in each required mode.
- The normal operator can recall named scenes and recover from a controller or fixture restart.
- The patch, firmware, power and rigging records match the installed system.
- Cleaning, inspection and replacement access are realistic for the venue team.
For a project discussion, send Aolait the stage plan, throw distances, camera settings, microphone positions, intended scenes, mounting constraints and control workflow. We can use that brief to narrow the relevant moving-wash options and identify the model-specific information that still needs a sample test. Discuss your project.
OUR ZOOM WASH RANGE
Explore the moving-wash options
Compare optics, color and installation format, then test the shortlist in your venue.
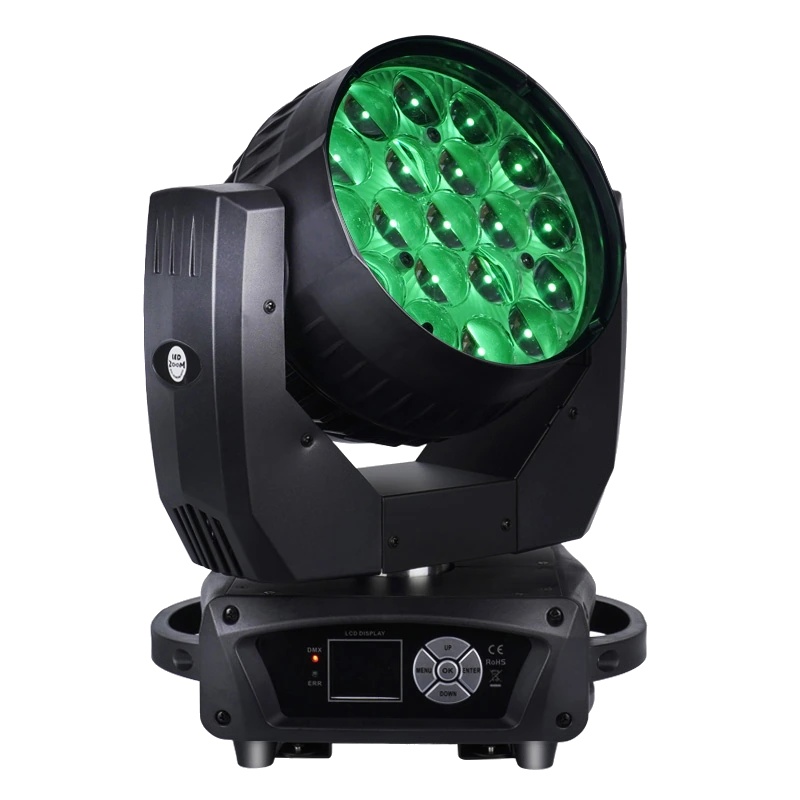
19×15W LED Wash Moving Head
AL1019WZ combines nineteen 15W RGBW 4-in-1 LEDs, broad motorized zoom and two DMX personalities in a 7.5 kg IP20 moving-head platform.
- LED: 19×15W
- Zoom: 8°–63°
- Color: RGBW
- Protection: IP20
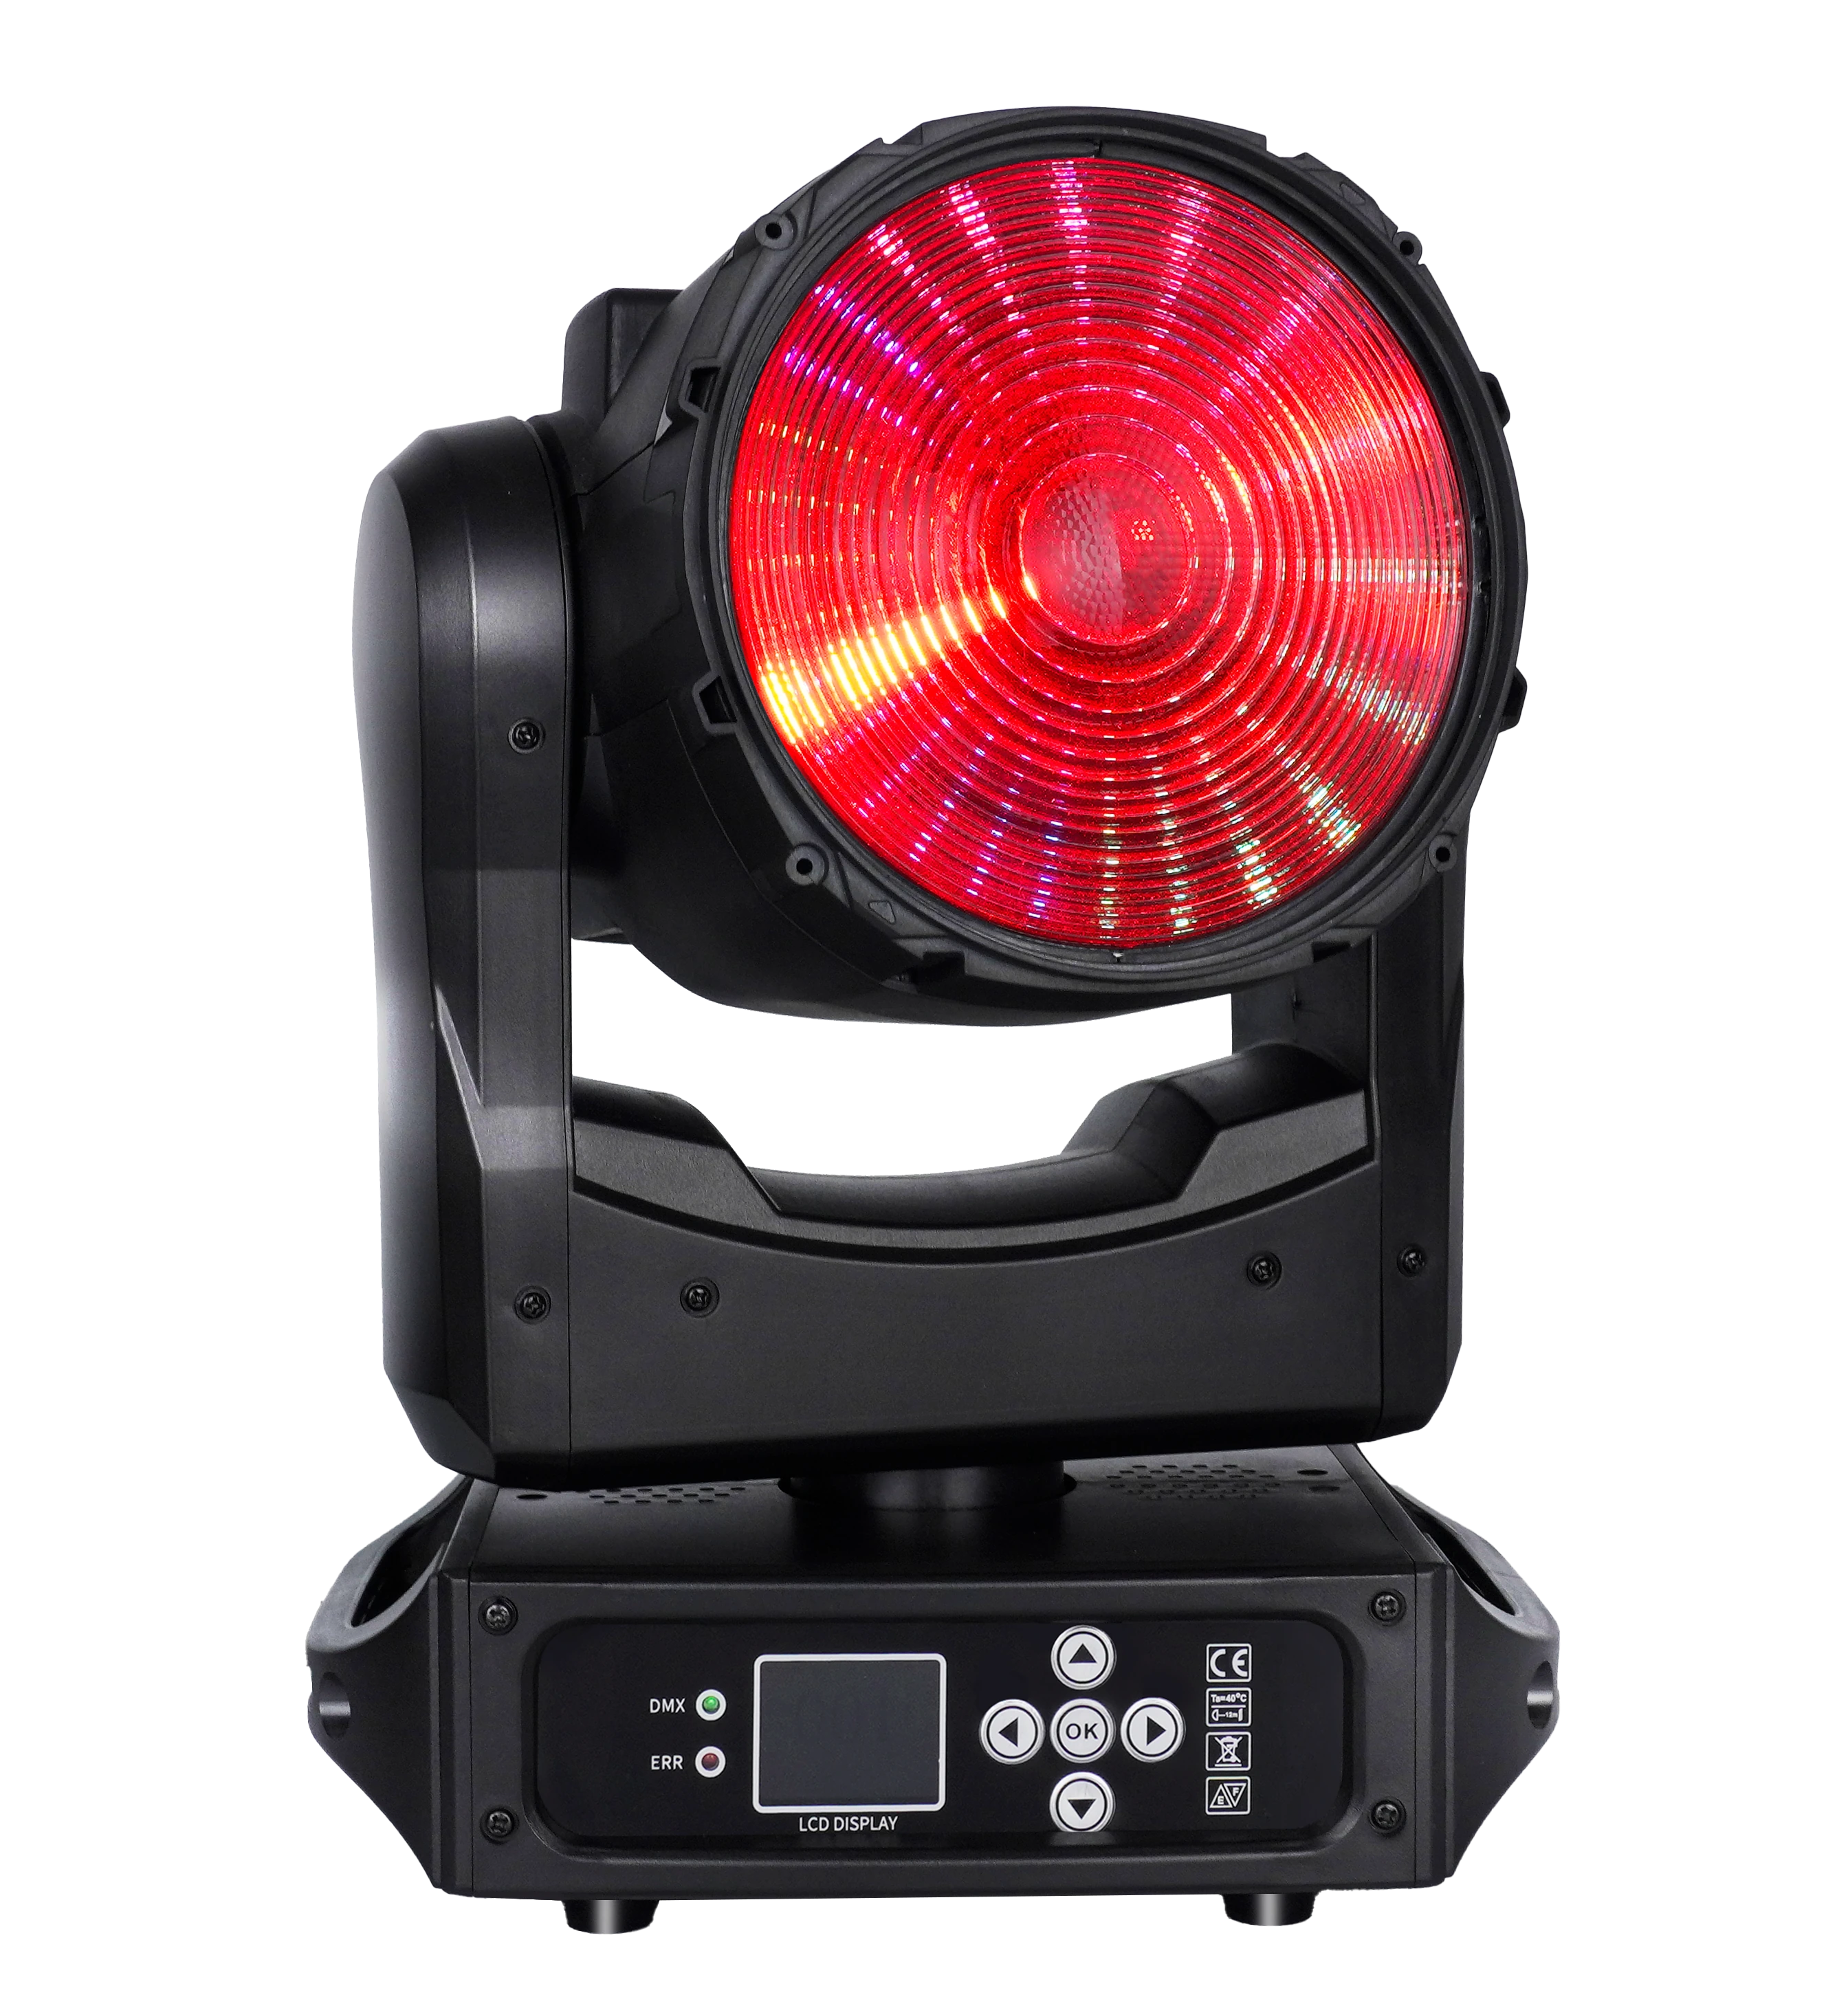
150W LED Wash ONE-effect Moving Head
AL150WX combines a 150W RGBL wash source with a 24-pixel RGB ONE-effect array, dynamic zoom-pulse effects and five DMX personalities.
- LED: 1 × 150W RGBL 4-in-1: red, green, blue and lemon
- Zoom: 19°–27°
- Color: RGBL
- Control: 24CH
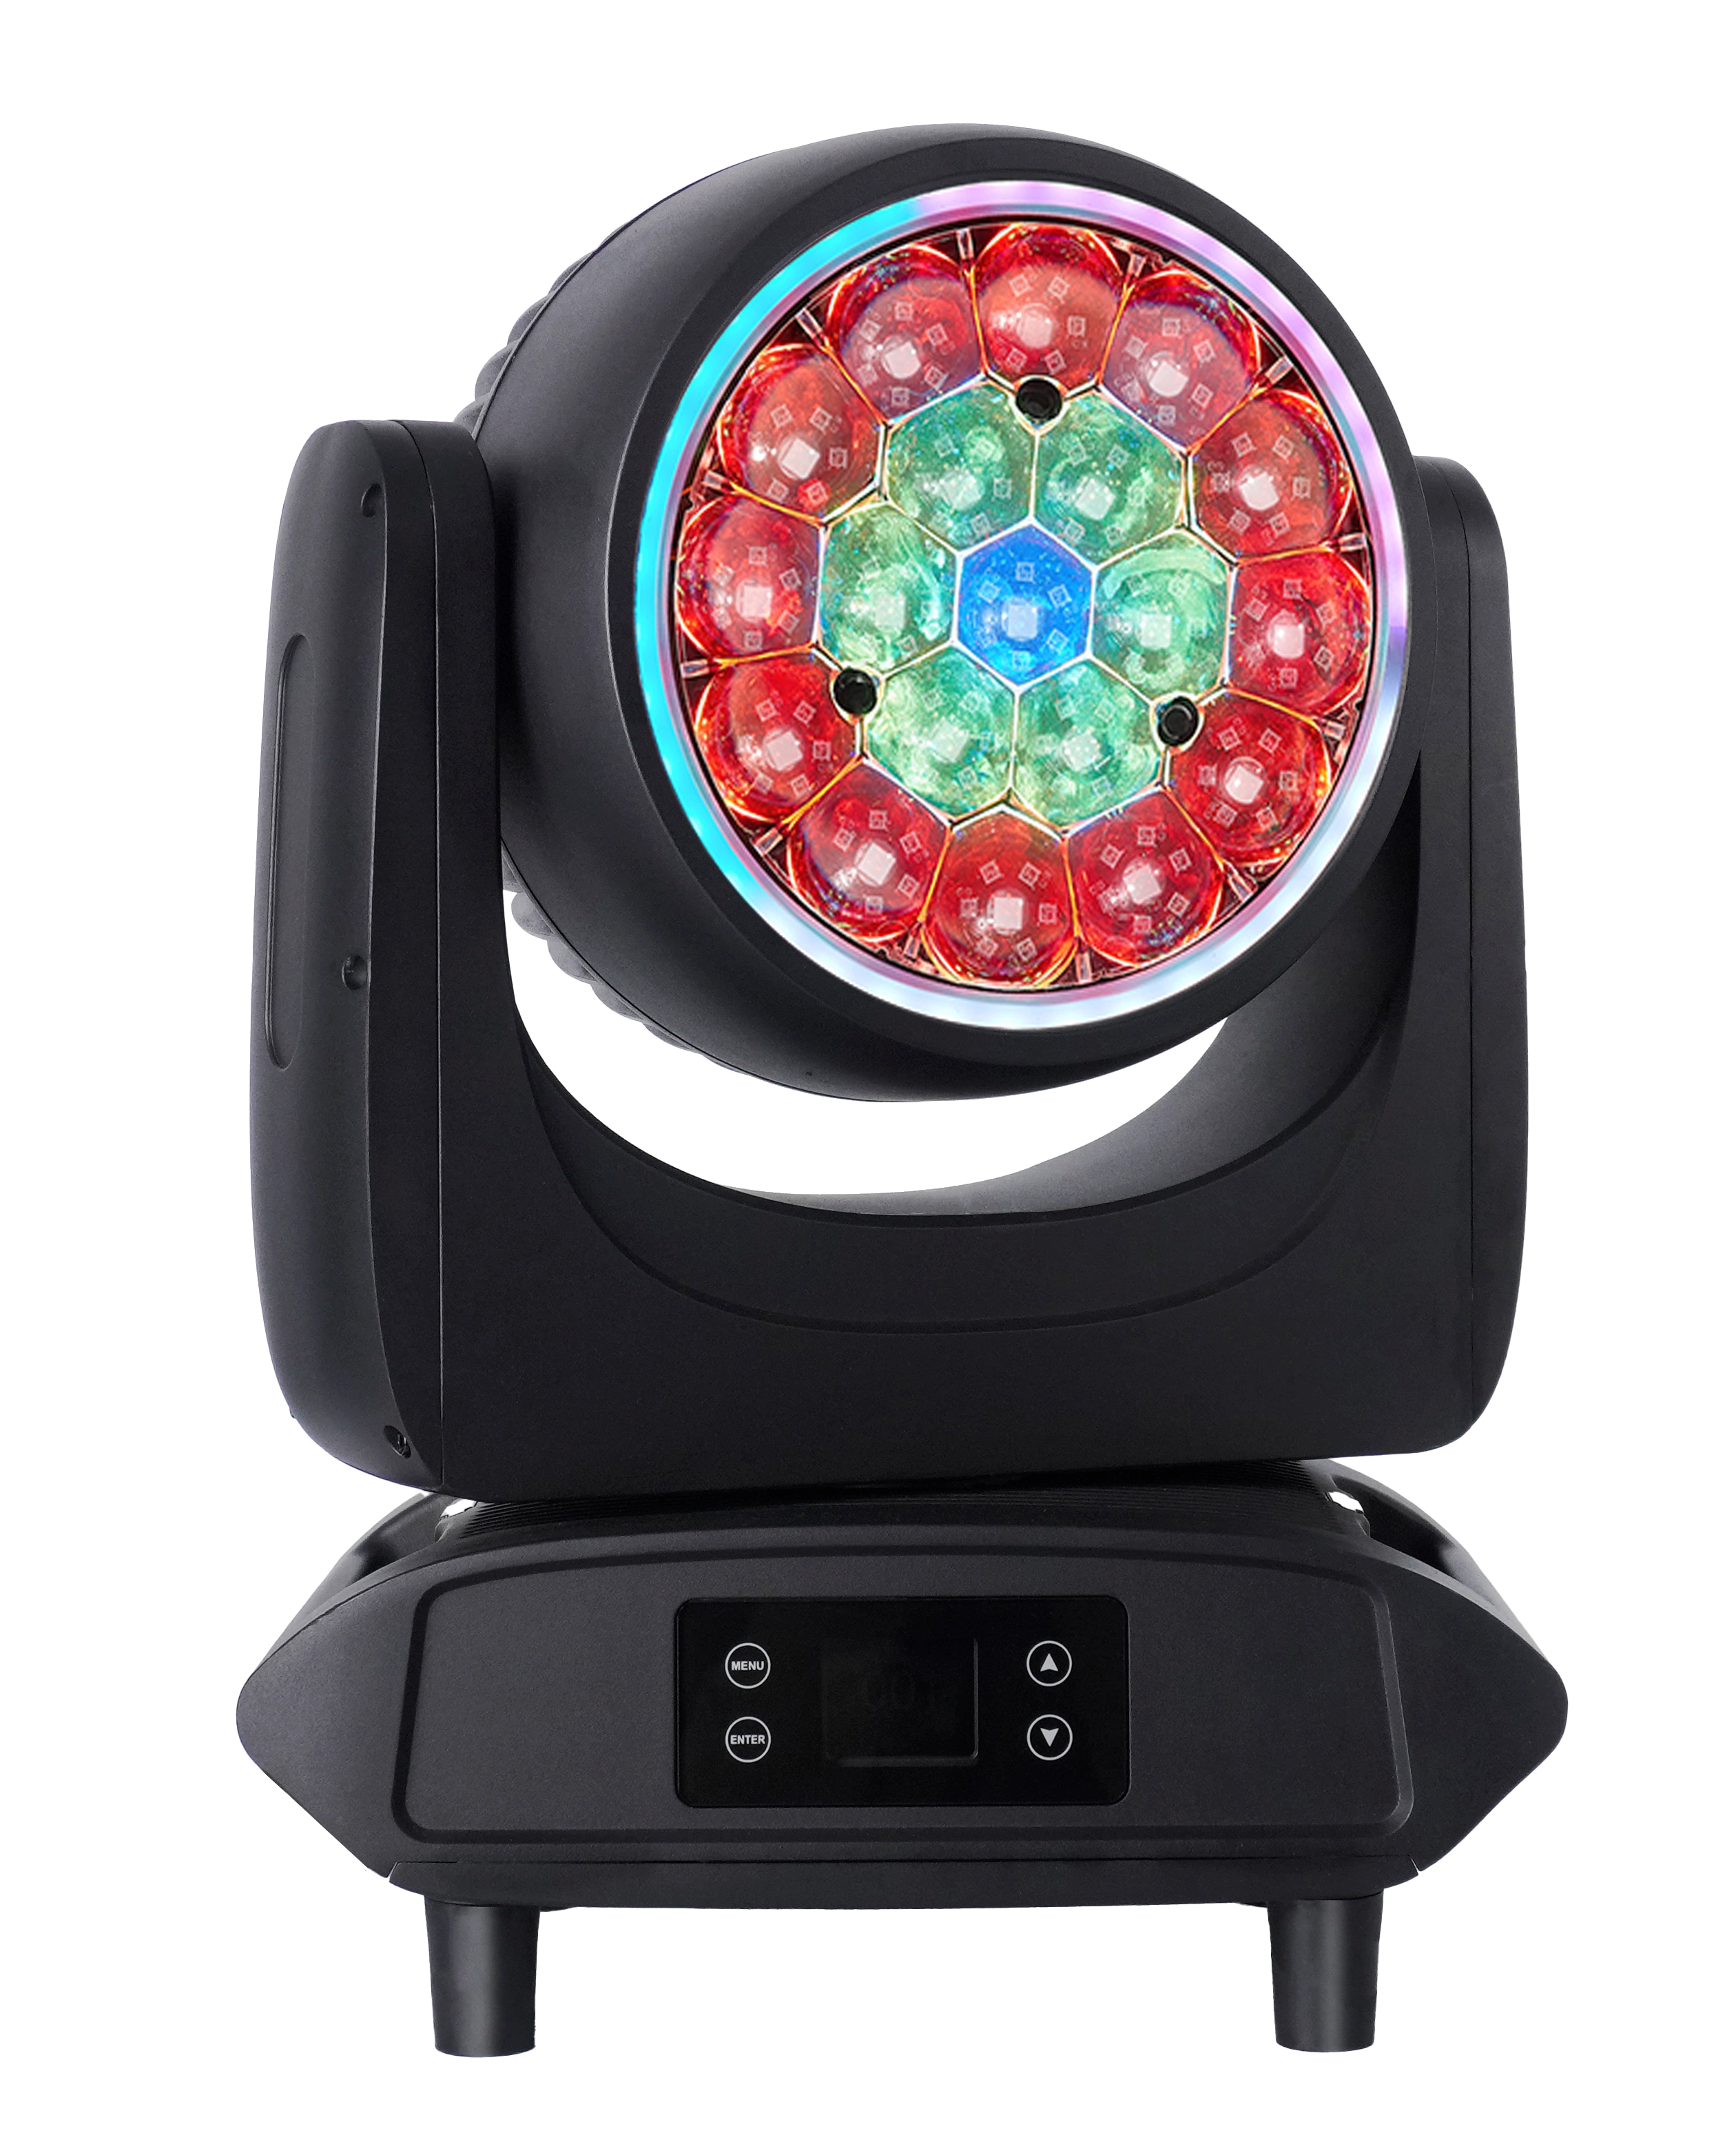
19×40W LED Moving Head Mini IP65 Waterproof
Aolait ALP1940WZ combines a 19×40W RGBW optical engine, three-zone effects and four DMX personalities in a 14kg full die-cast aluminum housing designed for mobile indoor and outdoor production workflows.
- LED: 19 × 40W RGBW
- Zoom: 4°–60°
- Color: RGBW
- Protection: IP65
FREQUENTLY ASKED QUESTIONS